
Reliable AC Repairs Start With Fast, Safe Diagnosis
If your AC blows warm air, has weak airflow, runs in short cycles, makes unusual noises, leaks water, or trips a breaker, start with a few safe checks: replace a dirty filter, confirm the thermostat is set to Cool, check the breaker, and clear debris from the outdoor unit. If the problem continues, schedule professional AC repairs promptly. Refrigerant, high-voltage electrical parts, motors, and compressors need trained service.
Quick action matters. A small issue, such as restricted airflow or a failing capacitor, can put extra strain on the compressor and turn a manageable repair into a major expense.
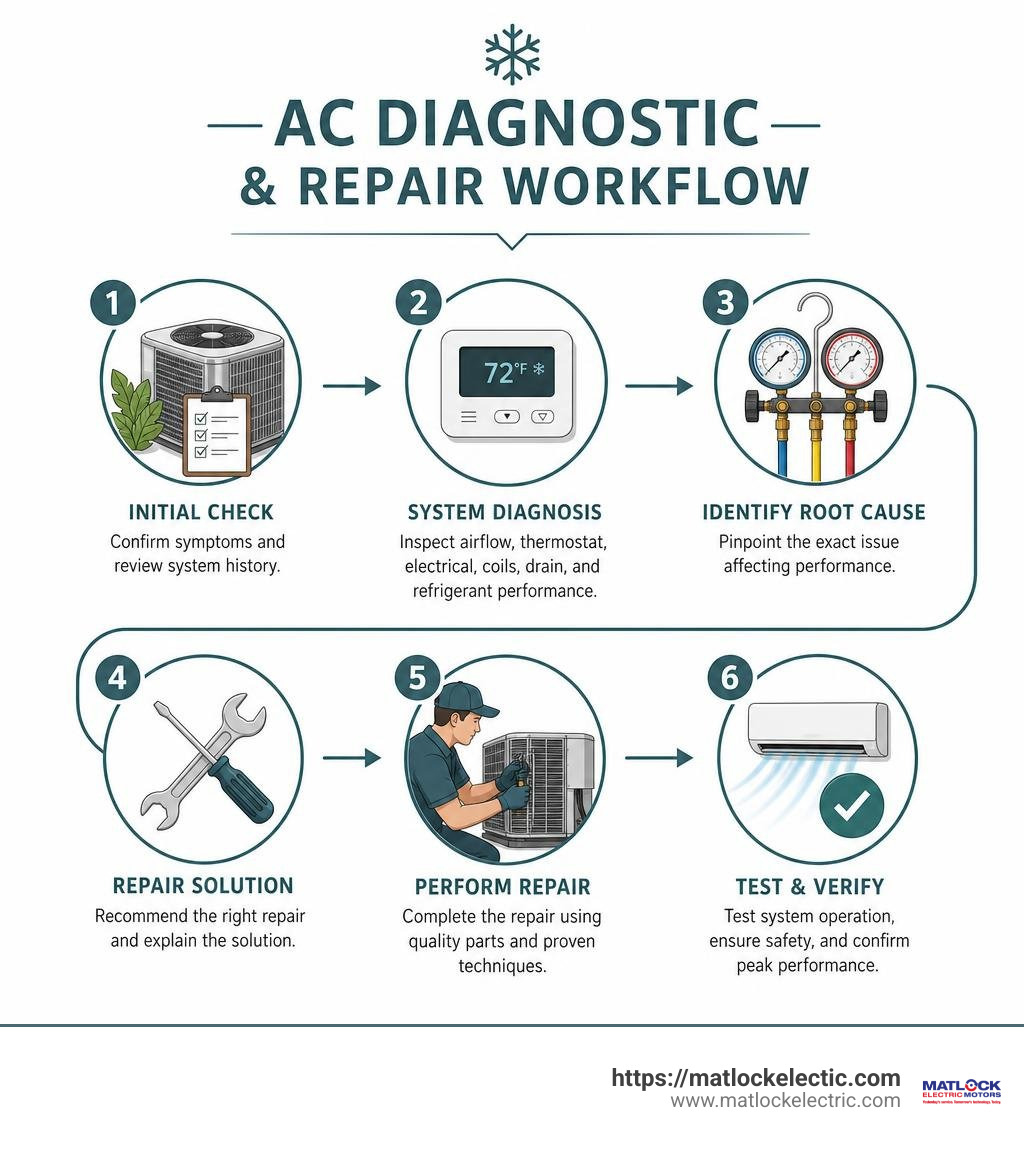
A reliable repair visit should identify the root cause, not just mask the symptom. That typically means checking airflow, thermostat operation, electrical connections, coils, drain lines, and refrigerant performance before approving any work.
This guide explains what your AC is trying to tell you, what you can safely troubleshoot yourself, what repairs commonly cost, and when repair or replacement makes better financial sense.
Recognizing Early Warning Signs of System Failure
Cooling equipment rarely gives up without warning. Long before a system stops operating altogether, it displays subtle signs of mechanical strain, electrical decay, and thermal imbalance. Recognizing these early signals helps protect your equipment from irreversible compressor damage, prevents skyrocketing energy bills, and avoids emergency breakdowns during peak summer heatwaves.
Signs Your System Demands Immediate AC Repairs
When an air conditioner begins to fail, its internal components struggle to maintain the refrigeration cycle. Pay close attention to these critical warning signs:
- Warm or Tepid Vent Air: If the indoor supply vents blow room-temperature or warm air while the outdoor condenser runs, the system may suffer from low refrigerant charge, a dead compressor, or a defective expansion valve.
- Weak or Diminished Airflow: Weak air coming from your registers often points to a failing blower motor, heavily clogged ductwork, or a suffocating air filter.
- Ice Along Refrigerant Lines and Coils: Frost or solid ice on copper lines or indoor evaporator coils indicates severe airflow starvation or a persistent refrigerant leak.
- Frequent Short Cycling: When a unit turns on, runs for two minutes, and shuts down abruptly, it is overheating or responding to rapid pressure spikes.
- Loud Grinding, Screeching, or Banging: Metal-on-metal screeching suggests worn motor bearings, while aggressive banging often indicates a broken internal connecting rod inside the compressor.
- Water Pooling Indoors: Standing water around the indoor air handler points directly to a clogged condensate drain line, cracked drain pan, or a burnt-out condensate pump.
- Burning or Pungent Odors: Acrid, burning plastic smells indicate overheated wiring, melting wire insulation, or an electric motor winding breakdown.
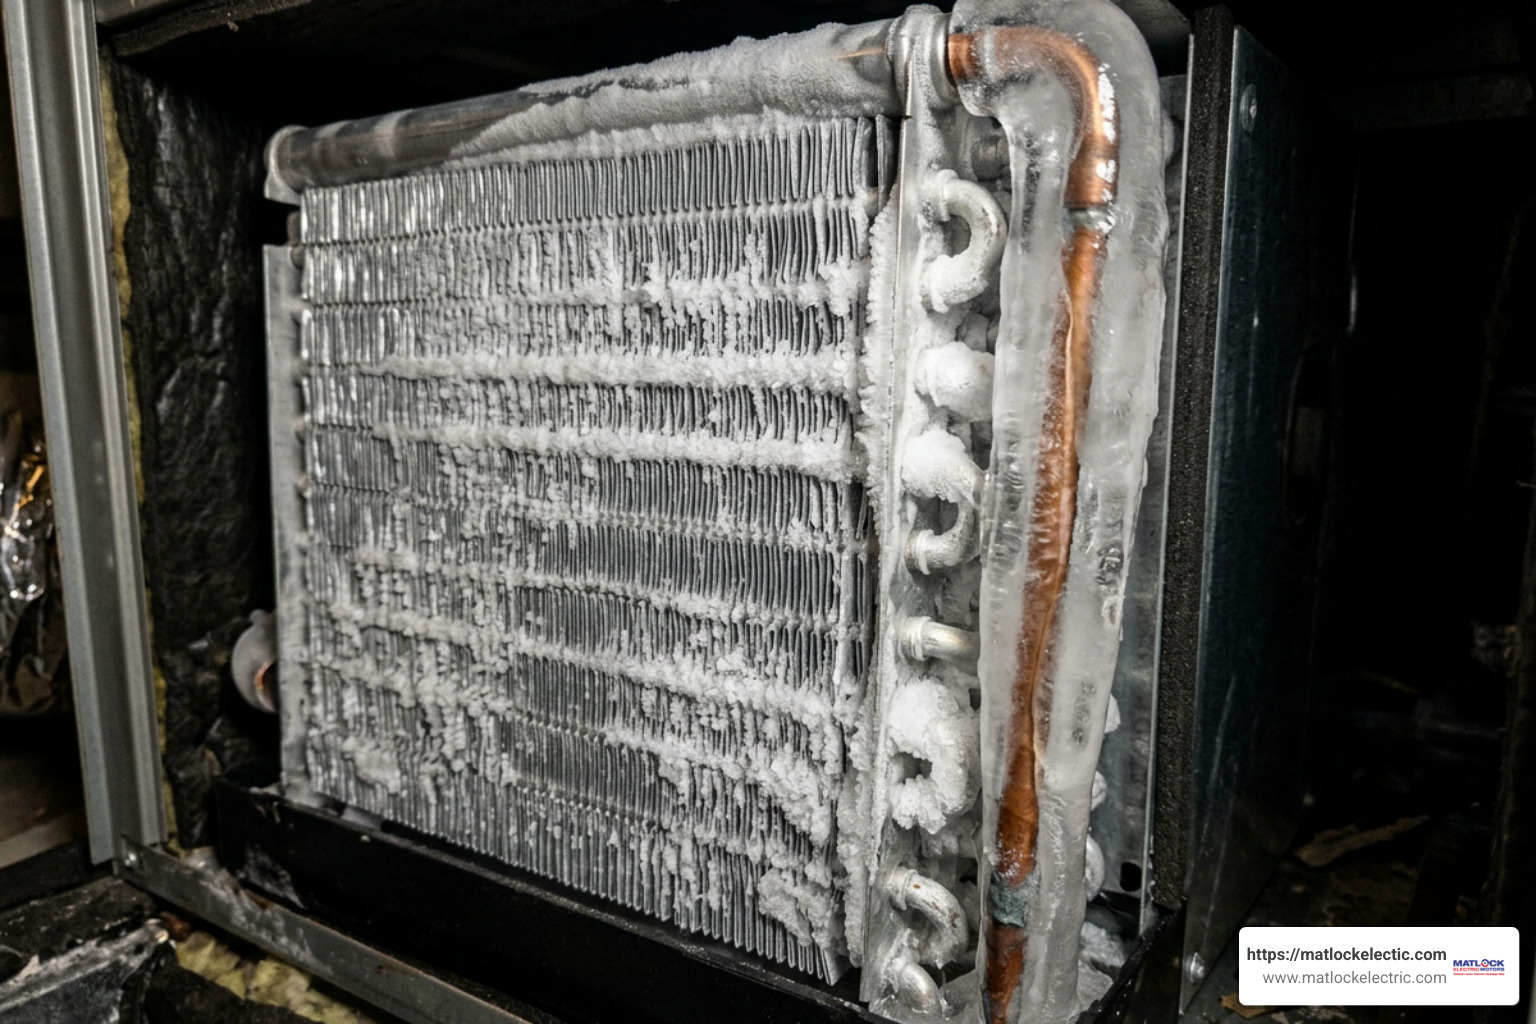
When these symptoms appear, continuing to run the system risks destroying the compressor or causing severe electrical damage. Relying on professional field services ensures the underlying faults are isolated and repaired safely before secondary damage spreads throughout the system.
Step-by-Step DIY Troubleshooting Before Calling Service
Before reaching for the phone to book a technician, performing basic triage can resolve simple operational issues and save you a diagnostic trip fee.
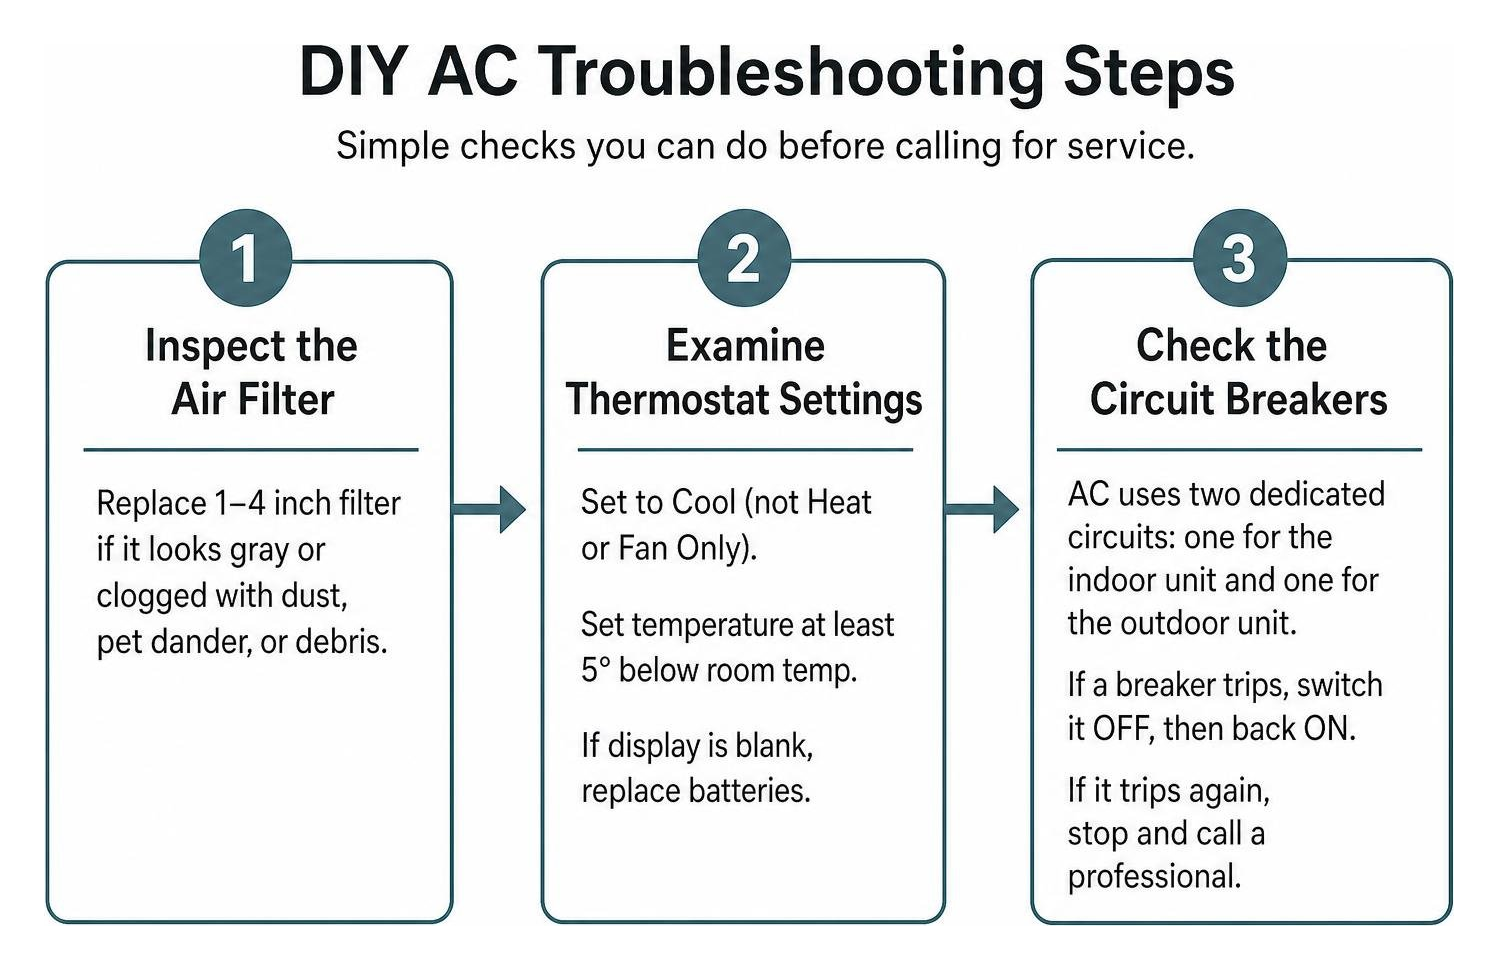
Follow these safe troubleshooting steps:
- Inspect the Air Filter: A filter coated in dust, pet dander, and debris starves the evaporator coil of warm air, causing it to freeze solid. Replace disposable 1-inch to 4-inch filters immediately if they look gray or clogged.
- Examine Thermostat Settings: Confirm the thermostat is firmly set to Cool rather than Heat or Fan Only. Set the target temperature at least 5 degrees below the ambient room reading. If the display is completely blank, replace dead alkaline batteries.
- Check the Circuit Breakers: Central cooling systems draw power through two dedicated circuits—one for the indoor air handler/furnace and one for the outdoor condensing unit. If a breaker has tripped, toggle it firmly to the OFF position before resetting it to ON. If it trips a second time, stop and call an electrician or HVAC professional.
- Clear Debris Around the Outdoor Condenser: The outdoor unit requires unobstructed airflow to expel indoor heat. Clear away dry leaves, lawn clippings, tall weeds, and keep at least two feet of open clearance on all sides.
- Inspect the Condensate Drain Line: If your drain line is backed up, the float safety switch will trip and cut power to the entire system to prevent water overflow. Check the drain termination outside to see if water is dripping freely, and clear minor blockages using a wet/dry vacuum.
- Verify Emergency Shutoff Switches: Ensure the standard toggle switch located next to your indoor air handler or furnace was not accidentally bumped to the OFF position.
Common Mechanical and Electrical AC Breakdowns
Air conditioning units operate in high-stress environments. High ambient outdoor temperatures, high humidity, and continuous runtimes push mechanical assemblies and high-voltage electrical circuits to their limits.
Motor Failures and Compressor Stress
The electrical control box and drive motors endure intense thermal cycling throughout the summer. The run capacitor acts as a continuous battery-like energy reservoir, providing the necessary phase shift and electrical torque to keep the condenser fan and compressor spinning smoothly. In scorching heat, capacitors degrade rapidly, swell, and burst, leaving electric motors humming and unable to start.
Contactor switches, which handle the heavy 240-volt electrical draw to engage the outdoor components, develop severe electrical pitting and carbon scoring over time. When contactors stick closed, the outdoor unit runs non-stop until the motor windings burn out. When they fail to pull in, the system remains dead.
Indoor blower assemblies also experience motor burnout due to neglected maintenance, dry sleeve bearings, and unbalanced squirrel-cage wheels. Technicians utilize advanced diagnostic procedures, following structured guides like troubleshooting motors a practical guide to resistance testing, to determine whether motor windings have grounded out or suffered phase-to-phase insulation failure. If motor bearings seize or windings short to ground, the compressor faces severe head pressure and thermal lockup.
Refrigerant Leaks and Airflow Restrictions
Air conditioners do not consume, burn, or lose refrigerant during regular operation. The cooling system is hermetically sealed. If refrigerant levels are low, there is an active leak in the copper tubing, the service valves, the evaporator coil, or the condenser coil.
Relying on quick “gas-and-go” top-offs without locating and repairing the leak violates federal environmental regulations and guarantees future breakdown. Under EPA Section 608 guidelines, licensed technicians must locate, braze, and seal refrigerant leaks before pulling a deep vacuum (below 500 microns) and recharging the system with virgin refrigerant by exact factory weight.
Beyond refrigerant leaks, severe airflow restrictions inside aging duct systems waste significant cooling energy. Leaky, unsealed ductwork run through hot attics can lose 20% to 30% of your total cooling capacity while drawing in dust, humidity, and insulation particles. Maintaining proper airflow balance across the entire static pressure envelope requires comprehensive mechanical services to ensure duct runs, plenum transitions, and blower assemblies operate at peak performance.
Estimating Costs and Timelines for AC Repairs
Understanding expected repair expenses helps homeowners budget effectively and avoid overpriced estimates or predatory upselling practices.
Breakdown of Component Pricing and Diagnostic Fees
In 2026, most residential cooling repairs range from $150 to $1,500, depending on whether the issue is a simple electrical replacement or a major sealed-system overhaul. A reputable contractor will perform a thorough multi-point diagnostic for a flat fee (typically $75 to $150), isolate the underlying problem, and present a written estimate before turning a single wrench.
| AC Component / Repair Service | Average Repair Cost Range (Installed) | Average Repair Time |
|---|---|---|
| Diagnostic Evaluation | $75 – $150 | 30 – 60 Minutes |
| Run / Start Capacitor | $150 – $350 | 1 – 2 Hours |
| Contactor Switch | $150 – $300 | 1 – 2 Hours |
| Thermostat Replacement | $150 – $450 | 1 – 2 Hours |
| Condensate Drain Flush / Float Switch | $150 – $350 | 1 – 2 Hours |
| Condenser Fan Motor | $450 – $750 | 2 – 3 Hours |
| Refrigerant Leak Detection & Repair | $350 – $1,200 | 2 – 4 Hours |
| Indoor Blower Motor (PSC vs ECM) | $600 – $1,500 | 2 – 4 Hours |
| Evaporator Coil Replacement | $1,800 – $3,200 | 4 – 6 Hours |
| Compressor Replacement | $2,200 – $4,500 | 4 – 8 Hours |
When tackling electrical component wear or motor rebuilds, turning to dependable industrial-grade repair specialists ensures that heavy-duty rotating equipment, custom windings, and electrical drives meet stringent operational standards.
How Long Typical Service Appointments Take
Most standard air conditioning service calls take between one to three hours to complete:
- Minor Repairs (1 to 2 Hours): Replacing start/run capacitors, swapping contactor relays, replacing blown fuses, clearing simple drain clogs, or installing a standard digital thermostat.
- Moderate Repairs (2 to 4 Hours): Nitrogen pressure testing, electronic refrigerant leak searches, coil chemical cleanings, or replacing indoor blower motors and outdoor fan assemblies.
- Major Sealed-System Repairs (4 to 8 Hours): Evaporator coil replacements, line set replacements, or compressor swap-outs. These repairs require recovering old refrigerant, brazing lines with nitrogen sweeps, pressure testing, pulling a deep vacuum, and charging the system to exact factory subcooling standards. If specialized OEM parts must be ordered, the repair may require a follow-up visit.
Evaluating Repair vs. Replacement Strategies
When facing expensive repairs on an aging air conditioner, homeowners must decide whether it makes more financial sense to fix the existing unit or invest in a modern, energy-efficient replacement.
The $5,000 Rule and the 50 Percent Lifespan Standard
Two primary formulas help guide this decision:
Example 1: A 4-year-old system needs a $300 capacitor. $$4 times 300 = $1,200$$ (Well below $5,000 — repair the unit).
Example 2: An 11-year-old system needs a $2,400 compressor replacement. $$11 times 2,400 = $26,400$$ (Far exceeds $5,000 — replace the unit).
Additionally, the 50 Percent Rule states that if a unit is more than 10 years old and the single repair estimate exceeds 50% of the cost of a brand-new system, replacement is the more sensible financial investment.
Modern units built to current SEER2 efficiency standards consume substantially less electricity, operate on modern, environmentally compliant refrigerants, and carry comprehensive 10-year manufacturer warranties that eliminate unexpected out-of-pocket repair costs.
Preventing Future Breakdowns with Scheduled Maintenance
The easiest way to avoid catastrophic compressor lockups and unexpected mid-summer failures is regular preventive maintenance. Having your system inspected every spring keeps minor wear from cascading into expensive equipment breakdowns.
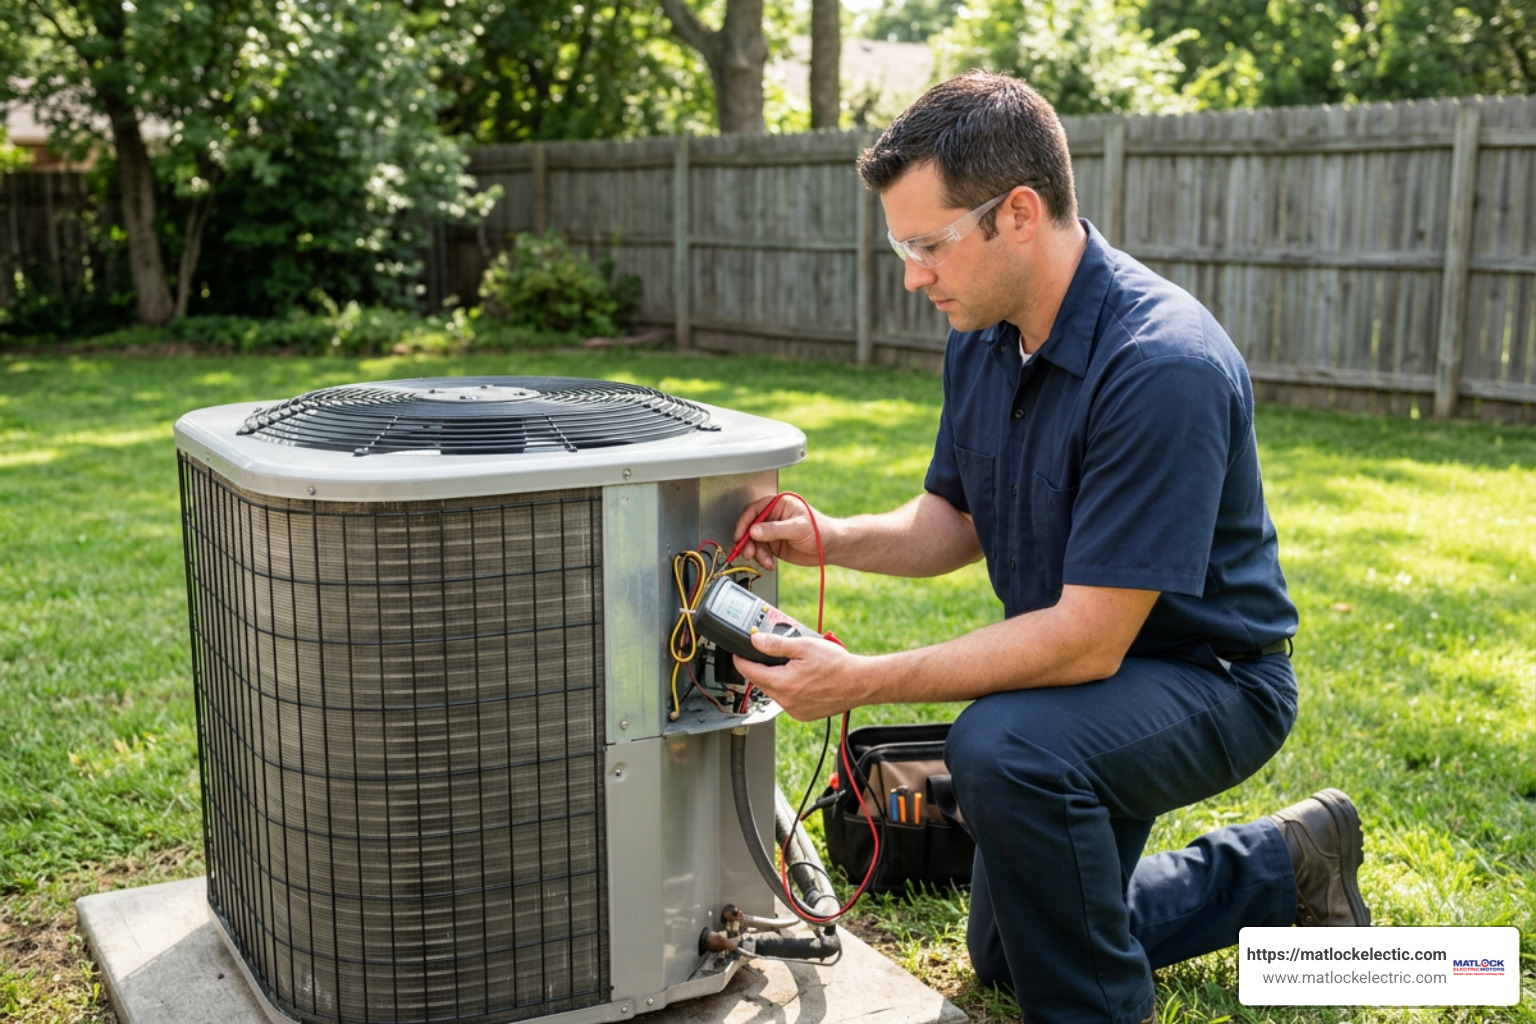
A comprehensive preventive maintenance inspection should include:
- Chemically cleaning indoor evaporator coils and outdoor condenser fins to restore heat transfer.
- Testing capacitor microfarad ratings and contactor point resistance.
- Measuring blower motor and compressor operating amperage against nameplate ratings.
- Flushing and treating condensate drain lines and inspecting secondary drain pans.
- Tightening all high-voltage electrical lugs and inspecting terminal wiring for heat discoloration.
- Checking static duct pressure, supply/return temperature splits (aiming for a 16°F to 20°F drop), and refrigerant superheat and subcooling levels.
- Verifying safety float switch operation and calibrating the thermostat.
What to Expect During Professional AC Repairs
When a certified HVAC technician arrives at your home, the service visit should follow a methodical, transparent process. Reputable service teams do not rely on guesswork or jump straight to high-pressure replacement pitches.
Technicians leverage modern technology in diagnostics to pinpoint the root cause of cooling issues. Digital manifold gauges measure real-time saturation temperatures to assess refrigerant performance, while true-RMS multimeters evaluate voltage drops, electrical resistance, and capacitor health under load.
Once the diagnostic evaluation is complete, the technician should walk you through their findings, explain exactly what failed, and provide a clear, flat-rate written quote before starting any repair work. After finishing the repair, the technician will run the system through a full cooling cycle, checking temperature splits, blower speeds, and safety controls to verify that the entire system is operating safely and efficiently.
Frequently Asked Questions About Cooling Repairs
How do I know if my AC issue is electrical or mechanical?
Electrical issues often cause total startup failure, humming sounds without fan movement, tripped circuit breakers, or swollen capacitors with burnt wire terminals. Mechanical issues usually produce grinding, squealing, or rattling noises, ice buildup on coils and refrigerant lines, low airflow, or continuous operation that blows warm air due to internal compressor or valve failure.
Is it safe to operate an AC unit that is short cycling?
No. Short cycling forces the compressor and fan motors to restart repeatedly against high head pressures, drawing heavy inrush current. This rapid cycling overheats the motor windings, trips the internal thermal overload switch, dramatically increases your electric bill, and can destroy the compressor in a short period of time.
How often should central cooling systems undergo professional service?
Central air conditioning systems should receive a professional tune-up at least once a year, ideally in the spring before heavy cooling demands begin. Heat pumps, which provide both heating and cooling year-round, should be serviced twice annually—once in the spring for cooling and once in the autumn for heating.
Conclusion
A reliable air conditioning system is essential for maintaining a cool, safe, and comfortable indoor environment. By recognizing early failure signs, tackling basic troubleshooting steps safely, and understanding common repair costs, you can make informed decisions when cooling issues arise. Whether your system requires a fast capacitor replacement, an electrical diagnostic, or a motor overhaul, trust the experienced specialists at Matlock Electric to deliver long-lasting, precision AC repairs that restore your home’s comfort and keep your equipment running at peak efficiency.